VSCode로 LATEX 쓰기
Texlive 설치
먼저, 아래 명령어 실행해서 chocolatey 최대 설치 시간제한 14400초로 늘림(기본 2700초라, texlive를 풀패키지로 설치하면 초과됨)
choco config set --name="'commandExecutionTimeoutSeconds'" --value=14400choco config get --name="'commandExecutionTimeoutSeconds'" 으로 잘 됐나 확인
choco install texlive --params="'/scheme:full'" 로 texlive 설치
설치에는 40분 가량 소요되었고, 미러 사이트가 이상한 데(한국 아님) 걸리면 많이 오래 걸릴 수도 있다. 혹여나 중간에 설치가 끊기면 chocolatey 임시 폴더에서 texlive 관련 temp파일 지우고 다시 설치 실행하면 아마.. 될 것이다. 난 두 번 시간제한 때문에 끊겨봤다.
VSCode Extension: TeX Workshop 설치
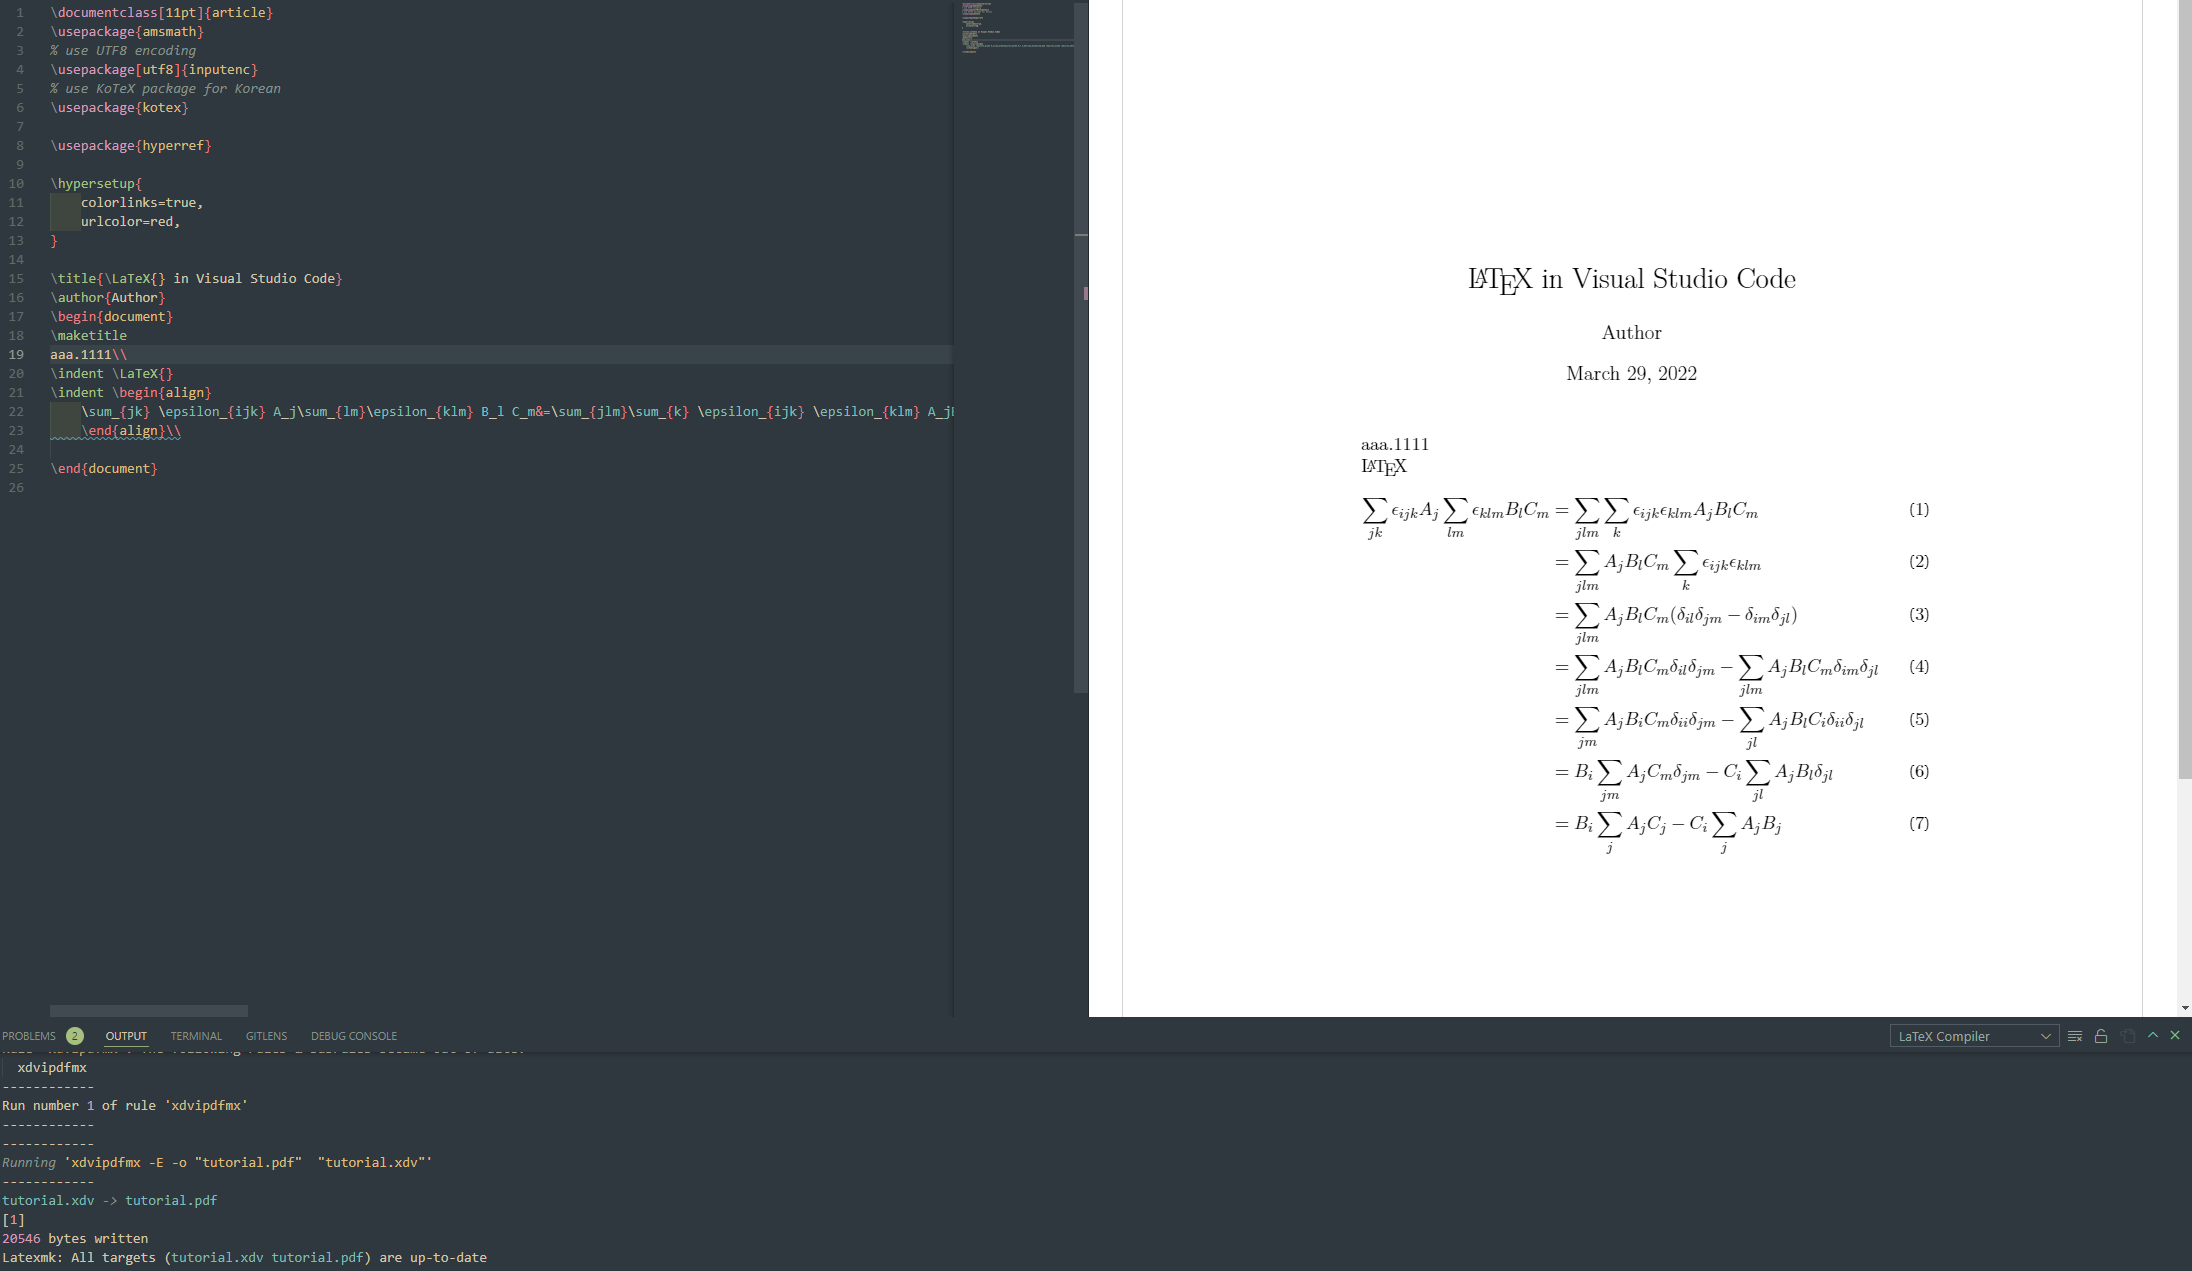
TeX Workshop이라는 익스텐션을 깔고, 시험삼아 test.tex에 아래 입력
\documentclass[11pt]{article}
\usepackage{amsmath}
% use UTF8 encoding
\usepackage[utf8]{inputenc}
% use KoTeX package for Korean
\usepackage{kotex}

\usepackage{hyperref}

\hypersetup{
    colorlinks=true,
    urlcolor=red,
}

\title{\LaTeX{} in Visual Studio Code}
\author{Author}
\begin{document}
\maketitle
aaa.\\
\indent \LaTeX{}
\indent \begin{align}
    \sum_{jk} \epsilon_{ijk} A_j\sum_{lm}\epsilon_{klm} B_l C_m&=\sum_{jlm}\sum_{k} \epsilon_{ijk} \epsilon_{klm} A_jB_l C_m\\&=\sum_{jlm}A_jB_l C_m\sum_{k} \epsilon_{ijk} \epsilon_{klm} \\&=\sum_{jlm}A_jB_l C_m(\delta_{il}\delta_{jm}-\delta_{im}\delta_{jl}) \\&=\sum_{jlm}A_jB_l C_m\delta_{il}\delta_{jm}-\sum_{jlm}A_jB_l C_m\delta_{im}\delta_{jl}\\&=\sum_{jm}A_jB_i C_m\delta_{ii}\delta_{jm}-\sum_{jl}A_jB_l C_i\delta_{ii}\delta_{jl}\\&=B_i\sum_{jm}A_j C_m\delta_{jm}-C_i\sum_{jl}A_jB_l \delta_{jl}\\&=B_i\sum_j A_jC_j- C_i\sum_j A_j B_j
    \end{align}\\

\end{document}
VSCode에서 저장하면(Ctrl+S) 자동으로 pdf 파일이 만들어지며, VSCode 우측 상단 버튼을 통해 pdf 확인 가능
실시간 미리보기는 어떻게 잘 하면 당연히 될 것 같긴 한데 기본으로는 안되는듯

Pandoc Markdown 이용
예시
---
papersize: a4
CJKmainfont: NanumGothic
margin-left: 0.5in
margin-right: 0.5in
margin-bottom: 0.5in
margin-top: 0.5in
---

한글한글
자신의 컴퓨터에 있는 한글폰트는 fc-list :lang=ko 커맨드로 확인하도록 하자.
참고로 실행은 xelatex를 이용하니까 되더라. 이거 말고도 뭐가 많은데 뭔 차이인지는 잘 모르겠고 일단 xelatex로 되니까 쓰려고 한다.
pandoc .\test.md -o test.pdf --pdf-engine=xelatex
VSCode pandoc extension의 setting에서 pdf opt string을 아래와 같이 설정하면 편리하게 쓸 수 있다. (알아서 필요에 따라 인자 더하고 빼자.)
-V fontsize=11pt --pdf-engine=xelatex --toc --template eisvogel --listings --number-sections -C--toc는 tableOfContents, --template는 후술할 템플릿 설정, --listings는 code section에 line number 추가, number-sections은 section마다 numbering 추가, -C는 --citeproc의 약자로서 "인용을 사용할거다"라는 말이다. template, 인용 설정에 대해서는 후술한다.
참고로, 폰트에는 mainfont, sansfont, monofont, mathfont, CJKmainfont라는 많은 종류가 있으며 mainfont만을 나눔고딕으로 설정하면 1. 혹시 컴퓨터에 나눔고딕 bold체가 설치되어 있지 않다면 bold와 italic이 모두 안 나올 것이고 2. bold체가 설치되어있으면 italic 체가 안 나왔을 것이다. 한글 폰트는 듣기로 italic체가 없다고 한다. 이유는 모름..
나는 mainfont, sansfont, monofont 열심히 바꿔보면서 italic체가 어떻게 나오게 할까 한참 삽질했는데 그냥 CJKmainfont만 바꾸면 그만이다. 아, 당연히 영어의 italic체가 잘 나온다는 말이고 한글은 italic 안 나온다.

데모로 써볼만한 md를 대충 첨부한다.
---
title: "테스트 타이틀"
date: "3872년 10월"
author: "Hope"
papersize: a4
margin-left: 0.5in
margin-right: 0.5in
margin-bottom: 0.5in
margin-top: 0.5in
CJKmainfont: NanumGothic
bibliography: bibliography.bib
csl: acm-siggraph.csl
---

hello[^1]
See the [foo](#foo), [My Heading]
Here is an inline note.^[Inlines notes are easier to write, since
you don't have to pick an identifier and move down to type the
note.]
Blah blah [@Markoff.2015]. \cite{Markoff.2015}
[@author00:_title]. \cite{author00:\_title}

\newtheorem{theorem}{Theorem}[section]
\newtheorem{corollary}{Corollary}[theorem]
\newtheorem{lemma}[theorem]{Lemma}

\section{Introduction}
Theorems can easily be defined:

\begin{theorem}
Let \(f\) be a function whose derivative exists in every point, then \(f\) is
a continuous function.
\end{theorem}

\begin{theorem}[Pythagorean theorem]
\label{pythagorean}
This is a theorem about right triangles and can be summarised in the next
equation
\[ x^2 + y^2 = z^2 \]
\end{theorem}

And a consequence of theorem \ref{pythagorean} is the statement in the next
corollary.

\begin{corollary}
There's no right rectangle whose sides measure 3cm, 4cm, and 6cm.
\end{corollary}

You can reference theorems such as \ref{pythagorean} when a label is assigned.

\begin{lemma}
Given two line segments whose lengths are \(a\) and \(b\) respectively there is a
real number \(r\) such that \(b=ra\).
\end{lemma}

# 123

# My heading {#foo}

## 123

### 123

한글한글
_한글한글_
**한글한글**
~한글한글~
~~한글한글~~
_**한글한글**_

```cpp
#include <bits/stdc++.h>
#define rep(i,a,b) for(int i = (a); i < (b); i++)
#define rep2(i,a,b) for(int i = (b) - 1; i >= (a); i--)
#define cinA(A, N) rep(i, 0, N) cin >> A[i];
#define coutA(A, N) rep(i, 0, N) cout << A[i] << " ";
#define all(x) (x).begin(), (x).end()
using namespace std;
using ll = long long;

const int MAX = 2e5 + 1;
string S;
int TC, N, M, A[MAX];
int main() {
    cin.tie(0) -> sync_with_stdio(false); cout.tie(0);
    cin >> TC;
    while(TC--){
        cin >> N >> M >> S;
        ll cnt = count_if(all(S), [](auto i){return i == '1';});
        if(cnt * M % N){
            cout << "-1\n";
            continue;
        }
        A[0] = count_if(S.begin(), S.begin() + M, [](auto i){return i == '1';});
        rep(i, 1, N) A[i] = A[i - 1] + (S[(M - 1 + i) % N] == '1') - (S[i - 1] == '1');
        rep(i, 0, N){
            if(A[i] == cnt * M / N){
                if(i + M <= N) cout << "1\n" << i + 1 << " " << i + M << "\n";
                else cout << "2\n" << 1 << " " << (i + M) % N << "\n" << i + 1 << " " << N << "\n";
                break;
            }
        }
    }
}
```

# References

[^1]: abcd
Theme 설정
 jgm
jgm여기서 마음에 드는 템플릿 골라다 쓰자.
참고로 chocolatey로 pandoc 설치했을 때 설치 경로는 C:\Users\유저명\AppData\Local\Pandoc\templates으로 보이는데 template을 넣어야 하는 경로는 %appdata%\pandoc\templates%이다. chocolatey로 설치하면서 설치 경로는 바뀌었는데 template 경로는 똑같은듯?;
참고로 templates 폴더가 존재하지 않아도 폴더를 만들고 넣으면 된다.
이후 커맨드라인에서 --template 인자를 통해 템플릿을 지정하면 된다.
인용 설정
인용에 필요한 것은 크게 2가지이다.
- bib 파일: 대충 아래처럼 생겼으며 인용할 문서에 대한 정보를 담고 있다. 아래에서 보이는 item1, item2, item3을 인용하고 싶으면 [@item1], [@item2, @item3]처럼 입력하면 된다.
@Book{item1,
author="John Doe",
title="First Book",
year="2005",
address="Cambridge",
publisher="Cambridge University Press"
}

@Article{item2,
author="John Doe",
title="Article",
year="2006",
journal="Journal of Generic Studies",
volume="6",
pages="33-34"
}

@InCollection{item3,
author="John Doe and Jenny Roe",
title="Why Water Is Wet",
booktitle="Third Book",
editor="Sam Smith",
publisher="Oxford University Press",
address="Oxford",
year="2007"
}
2. csl 파일(필수 아님): 자신이 제출할 학회마다 Reference의 틀을 정해줄 텐데, 그걸 csl 파일이라 보면 된다. 여러 곳에서 사용하는 csl 파일은 이곳을 참고하자. 사용자가 직접 설정하지 않으면 뭔가 default 양식으로 만들어주는데 이 default가 뭔진 모르겠다.
이 둘이 있을 때, pandoc의 인자로 -C를 넣어주고, 마찬가지로 인자 또는 문서의 최상단에 bibliography와 csl을 기입해주면 원하는 대로 기입된다. 자세한 구현 방식은 위의 예제 참고.
참고 링크
 XuehaiPan

자세한 설명은 아래 링크 참고